How To Install Ispconfig Behind A Firewall Within A NAT Network
in this post i will try to explain how you can install ispconfig behind a firewall using NAT. for my example, i will be using a cisco PIX 501 firewall using NAT and PAT [1563], Last Updated: Sat May 18, 2024
wallpaperama
Sun Jun 05, 2011
0 Comments
1855 Visits
in this post i will try to explain how you can install ispconfig behind a firewall using NAT. for my example, i will be using a cisco PIX 501 firewall using NAT and PAT.
so for example, i have a WAN ip address of: 205.15.20.33 and my domain name is: example.com
this is how my nameserver are setup:
example.com
ns1.nameserver.com - 205.15.20.33
ns2.nameserver.com - 205.15.20.53
as you can see from the example above, my traffic should go to the 205.15.20.33 for all example.com domain name
the server will have ip address of:
10.20.20.20
configure firewall to translate traffic coming from 205.15.20.33 to 10.20.20.20
tutorial: http://www.webune.com/forums/20101003cggg.html
so i install ispconfig 2 on server ns1.nameserver.com
during installation, ispconfig will ask for ip address:
10.20.20.20
after installation you can access ispconfig panel witht he wan ip:
https://205.15.20.33:81/index.php
once you login to admin, go to Management > Server > Settings
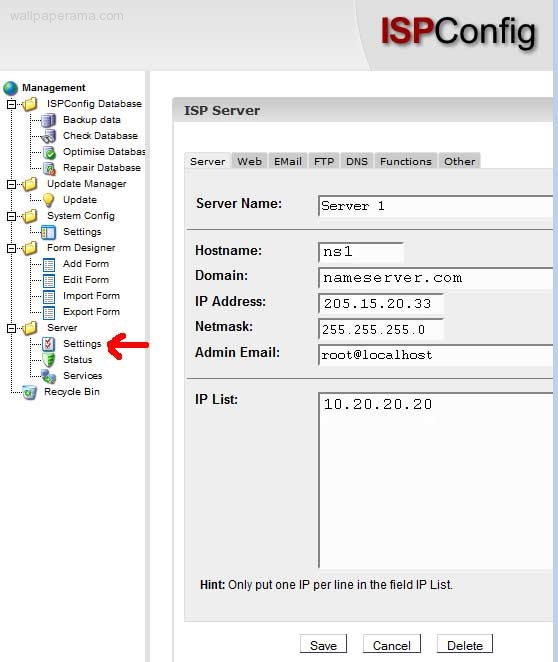
be sure to set the WAN ip address and the LAN ip address as shown on the image above
in my example i have:
Server Name: Server 1
Hostname: ns1
Domain: nameserver.com
IP Address: 205.15.20.33
Netmask: 255.255.255.0
IP List: 10.20.20.20
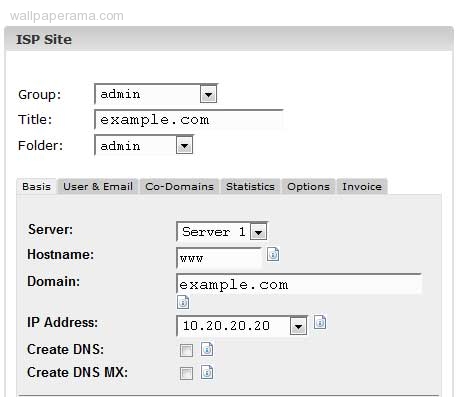
next, we create a domain name in the control panel. everything will be the same, except when you select the ip address select the LAN IP 10.20.20.20
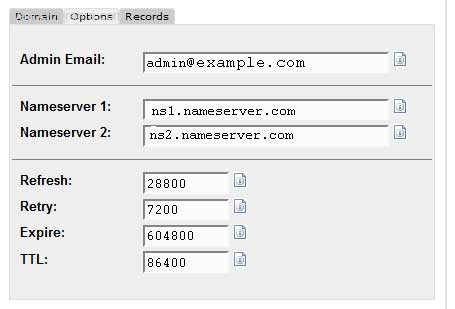
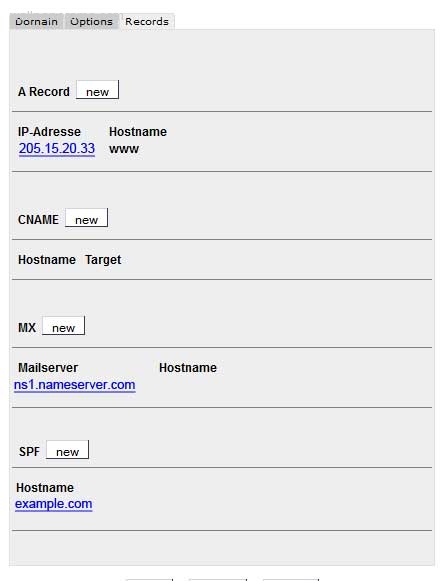
after you have created the new site, confirm the settings under DNS manager are correct, on my example this is how they are set:
DNS Entry
Domain:
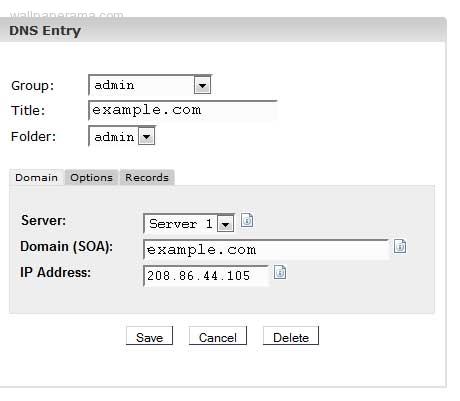
Options:
Record:
so for example, i have a WAN ip address of: 205.15.20.33 and my domain name is: example.com
this is how my nameserver are setup:
example.com
ns1.nameserver.com - 205.15.20.33
ns2.nameserver.com - 205.15.20.53
as you can see from the example above, my traffic should go to the 205.15.20.33 for all example.com domain name
the server will have ip address of:
10.20.20.20
configure firewall to translate traffic coming from 205.15.20.33 to 10.20.20.20
tutorial: http://www.webune.com/forums/20101003cggg.html
so i install ispconfig 2 on server ns1.nameserver.com
during installation, ispconfig will ask for ip address:
10.20.20.20
after installation you can access ispconfig panel witht he wan ip:
https://205.15.20.33:81/index.php
once you login to admin, go to Management > Server > Settings
be sure to set the WAN ip address and the LAN ip address as shown on the image above
in my example i have:
Server Name: Server 1
Hostname: ns1
Domain: nameserver.com
IP Address: 205.15.20.33
Netmask: 255.255.255.0
IP List: 10.20.20.20
next, we create a domain name in the control panel. everything will be the same, except when you select the ip address select the LAN IP 10.20.20.20
after you have created the new site, confirm the settings under DNS manager are correct, on my example this is how they are set:
DNS Entry
Domain:
Options:
Record: