Tutorial For Making Rounded Corners In On Your Pictures In Photoshop
in this easy tutorial, i will show you step by step guide on how to make rounded pictures using photoshop, i will show you with images and each step to take from start to finish [1567], Last Updated: Sat May 18, 2024
mel
Wed Jun 15, 2011
0 Comments
801 Visits
today i will show you how you can make a picture with rounded corners.
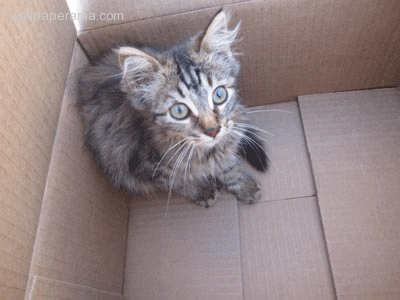
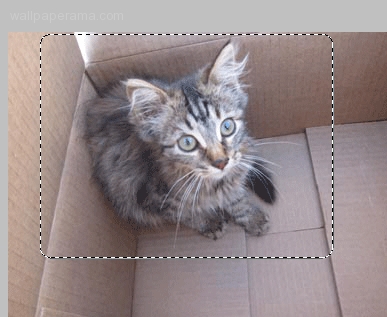
1. first we begin with a normal image. here is a picture i took of a little kitten i rescued. her name is flower
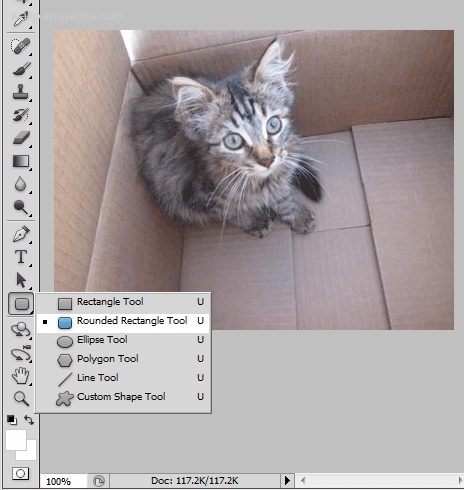
2. select the 'rounded rectangle tool from the left menu
3. select the area that you want to create the new image with rounded corners. its ok, dont worry, the foreground color will be white. this shows you what area you are selecting.
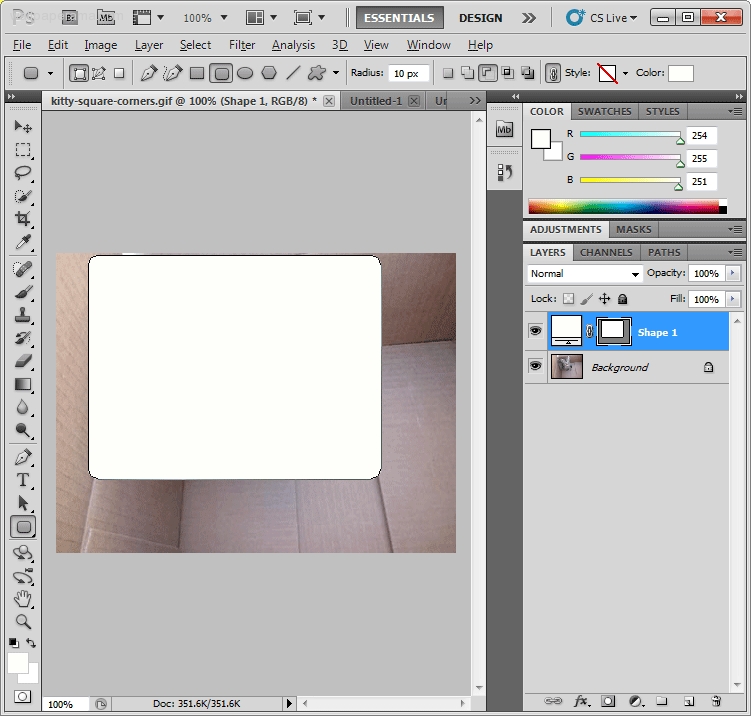
Notice a few things on this snapshot:
1 - you should have two layers
2 - the radius is set to 10 px
NOTE: you can change the size of the rounded corners in the 'Radius' field.

4. In the main menu go to Layer > Layer Style > Blending Options
here be sure to set 0% under opacity
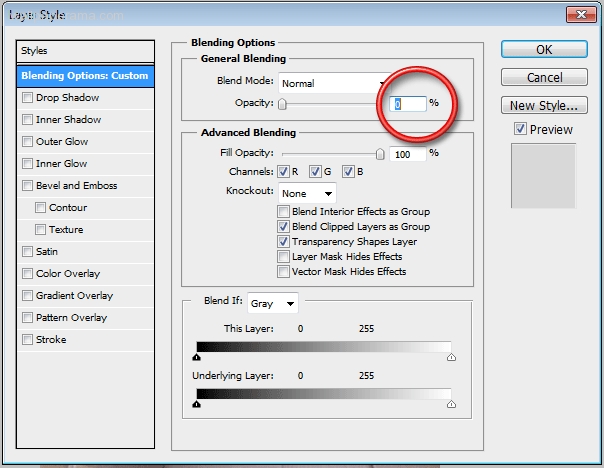
you will see that the foreground color will disappear and the selection area will be shown by dotted lines.
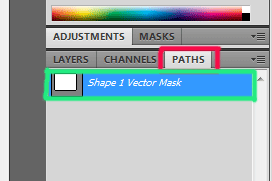
5. click on the 'PATHS' tab (red area in my snapshot) and right click in the shape 1 vector mask (green area in my snapshot) - when you right click, you will get a menu. select 'Make Selection...' option
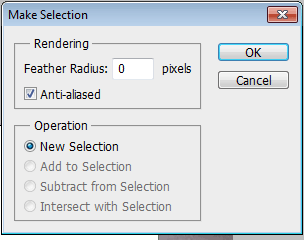
6. you will get a popup, here i just leave the defaults and clikc ok
7. now all you do is copy the selected area (control + c), create new document (control + n) and paste the copied image (control + v)
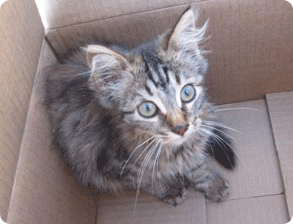
done
* Remember to be kind to animals. Flower helped us make rounded corners, so now we can help all the little animals from human abuse.
1. first we begin with a normal image. here is a picture i took of a little kitten i rescued. her name is flower
2. select the 'rounded rectangle tool from the left menu
3. select the area that you want to create the new image with rounded corners. its ok, dont worry, the foreground color will be white. this shows you what area you are selecting.
Notice a few things on this snapshot:
1 - you should have two layers
2 - the radius is set to 10 px
NOTE: you can change the size of the rounded corners in the 'Radius' field.
4. In the main menu go to Layer > Layer Style > Blending Options
here be sure to set 0% under opacity
you will see that the foreground color will disappear and the selection area will be shown by dotted lines.
5. click on the 'PATHS' tab (red area in my snapshot) and right click in the shape 1 vector mask (green area in my snapshot) - when you right click, you will get a menu. select 'Make Selection...' option
6. you will get a popup, here i just leave the defaults and clikc ok
7. now all you do is copy the selected area (control + c), create new document (control + n) and paste the copied image (control + v)
done
* Remember to be kind to animals. Flower helped us make rounded corners, so now we can help all the little animals from human abuse.