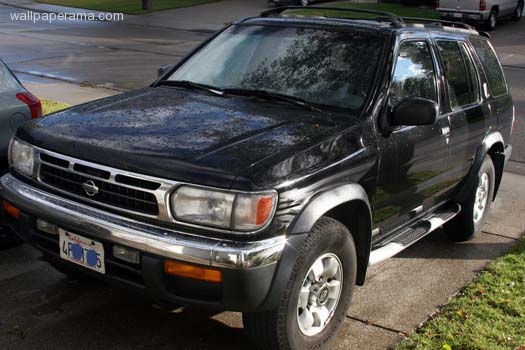
Nissan Pathfinder - How To Replace Suspension Links To Fix Wobble
this guide will show you how to fix the nissan pathfinder wobble problem with the suspension links. This turials contains step by step instruction with pictures as I repaired the suspension links to fix the wobble problem found on nissan pathfinders SUVs [1898], Last Updated: Sat May 18, 2024
Eduardo - pathfinder owne
Sun Dec 07, 2008
90 Comments
58811 Visits
Nissan pathfinder problems
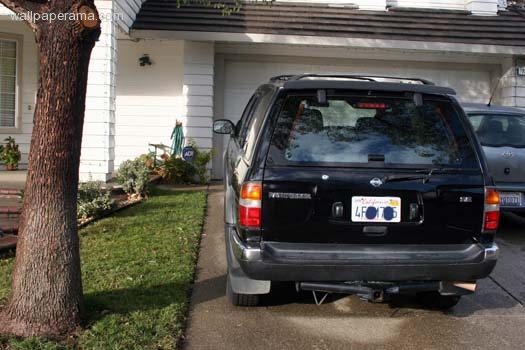
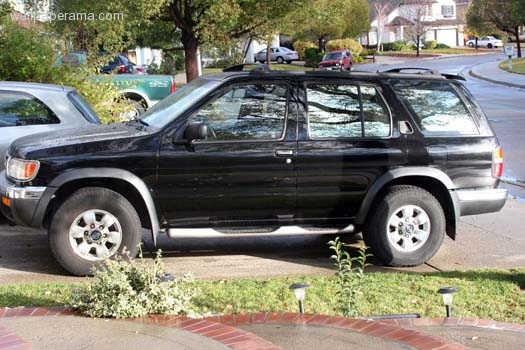
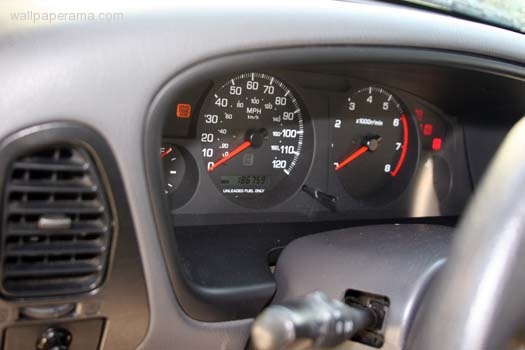
i have a 1998 Nissan pathfinder, and I need to replace the upper and lower control arm links in the rear suspension because its not safe to drive because of the problem I am having. you see the problems I am having with this SUV is that when I am driving it rocks side to side and you feel like the car is going to roll over or something, its feels very unsafe when it does that. to fix it, I will have to replace the bushings.this is in regards to post:
http://www.wallpaperama.com/forums/nissan-pathfinder-wobbles-problem-rocks-side-to-side-t6838.html
NOTE:
upper and lower control arms are also known as links.The Dealer
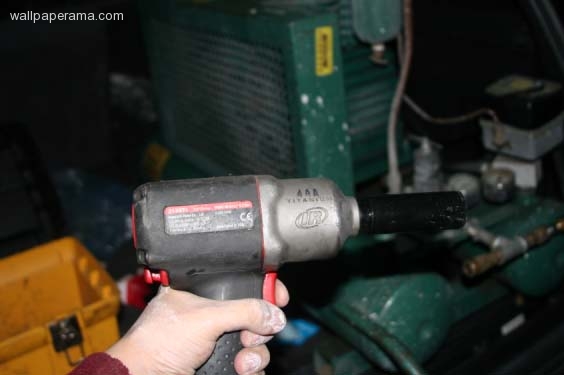
i went to the dealer and they told me there was a service bulletin on this. I bought both of the upper and lower control arms, the whole thing cost me $620 dollars.then I went to my local equipment rental, and I rented a pneumatic impact wrench and an air compressor, it cost me $60 dollars for one day. you will need an impact wrench, otherwise, you will not be able to do this. the bolts are just to tight to remove them by hand, trust me, I tried.
Required Tools
I have created a complete list of all the tools I have used on this project. Please review this list I have put together so you can get them ready when you start tackling this project on your own. This will is very helpful. I wish i had all these tool ready before I started replacing the suspension links. Make sure you have them all
First tool is: A Phillips screw driver
Set of metric high impact sockets
You cannot do this job without high impact sockets, I didn't have these, usually i don't do big jobs. I was thinking about just using the regular socket set i have at home, but trust me, you will need a set of high impact sockets. Otherwise, I don't recommend you go any further. For your safety.
Summary of Required Tools
these are the list of tools I use:
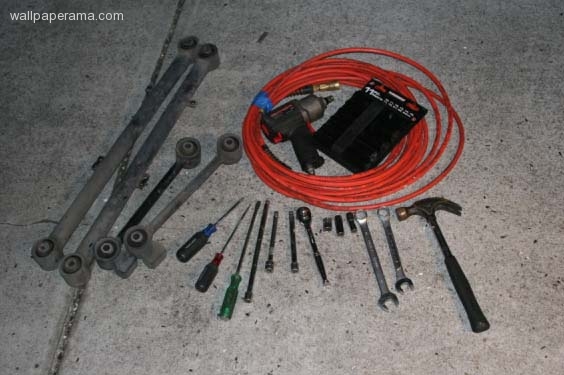
from left to right
* the four bars you see on the left, are the old upper and lower control arms. the first two (long) are the lower control arms, the two small ones are the upper control arms.
* Phillips screw driver
* thin and long straight screw driver
* hard and long straight screw driver
* 3/8 1ft extension
* 3/8 6inch extension with wobble
* 3/8 6inch extension
* 3/8 wrench
* 3/8 14mm socket
* 3/8 12mm deep socket
* 3/8 10mm deep socket
* 19mm wrench
* 17mm wrench
* hammer
* set of metric high impact sockets
* pneumatic impact wrench with hose
now that you have these tools, its time to get dirty.
About Me
Before we start, a little bit about me.. Hi my name is Eduardo, I am from the country of El Salvador. El Salvador is a small peaceful country in Central America. We have many Nissan cars there. I want to apologize for my English is not perfect. My primary language is Spanish.Safety
the first step is to make sure you are aware of shop safety, you will be working under a car, proper safety should be practice. DISCLAIMER: I don't take responsibility for any injury you may have. this is tutorial is only meant as informational purposes, its up to you do the repairs. don't try this if you are unsure of any of the steps. Its best to pay a professional to do it. Now that you are aware of my disclaimer, lets get started, below is the step by step tutorial on how to replace the links on a Nissan Pathfinder:Step By Step Tutorial
These are the steps you will need to complete in order to successfully replace the suspension links on your Nissan Pathfinder. Please note the the issue with the wobbling is the rear suspension. You do not have to do anything with the front suspension. I will show you each step I took. I included some pictures for each step so you can see exactly what I did. I know pictures help a lot. OK. Lets get started, Click on the Start button to begin this tutorial.
Raise The Vehicle
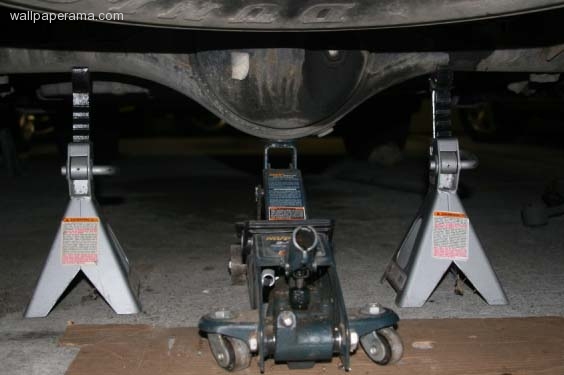
The first thing you want to do is raise you Pathfinder using a car jack.
Neutralize Tension
HERE IS THE TRICK. to neutralize the tension on the links, get your jack and put it on the axle. Raise it just enough as the tires get off the ground. raise the vehicle as soon at the tires come up from the ground:
Remove Bolts

start with the driver side of the truck. and remove the three bolts holding the brake cable (red dots) and remove the plastic screws and bolts using 10mm and 12mm sockets (green dots)
Remove More Bolts
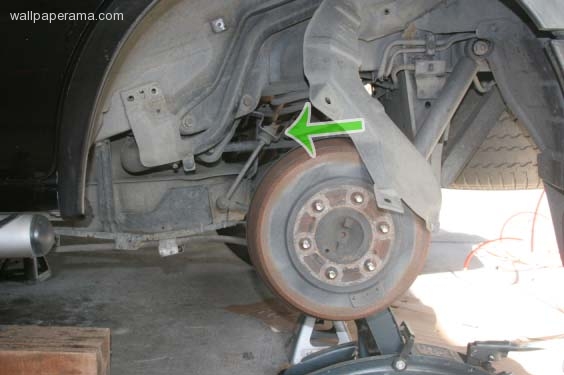
now that you have access to removing the sway bar links, remove the two bolts (green arrow)
Remove Brake Cable
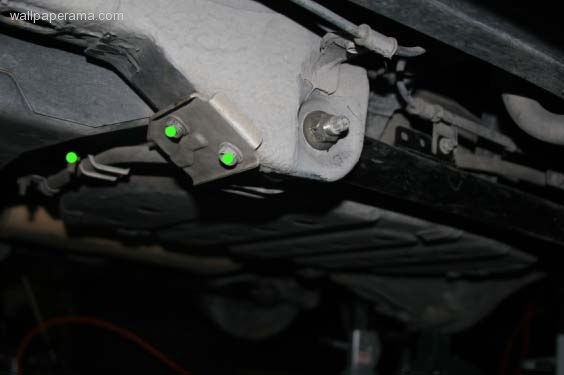
still on the driver side, remove the three bolts holding the brake cable (green dots)
Remove Control Arms
Now that you've remove the brake cable and plastic cover to gas hose, you will have access to removing the bolts holding the lower and upper control arms. remove them and replace them with the new ones. as you can see from the last picture above, I replaced mine with the new one.
now once you have install the upper and lower control arms on the driver side, put back all the bolts your removed and put back everything together and install the tire. and move to the passenger side.
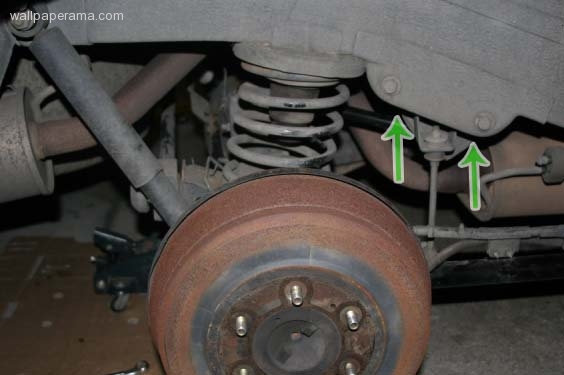
the passenger side will be easier. all you have to do is remove the two bolts holding the sway bar link. (green arrows)
NOTE: This picture shows two green arrows pointing to the two bolts, but its the bolts I am talking about are actually under neath the bolts the you see on the arrows on this picture.
Upper Control Arm

once you have removed the sway bar links, you will have easy access to the bolt holding the upper control arm.
once you have remove and install the new upper and lower control arms, you can put back everything together and install the wheel. and you are done.
Conclusion
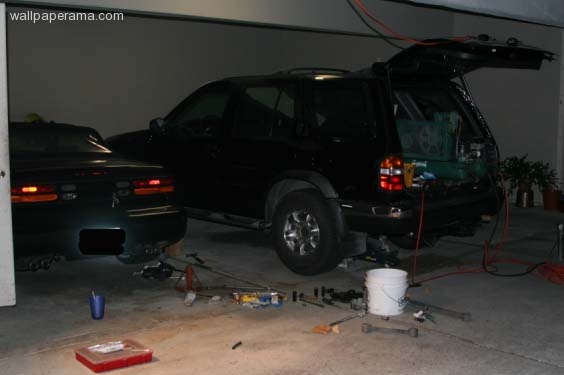
installing and replacing these control arm links is straight forward process, you just have to be patient and not rush it and use the proper tools. here is a picture of where I had the air compressor while I worked on the truck next to my 300zx.
after the installation was complete, I went for a test drive, and it was amazing, the truck didn't have the problem of swaying back and forth side to side. It was great.
Alternative
a cheaper alternative would be to replace the bushings only. each busing costs like $25 bucks. It will be much cheaper. the only problem is that in order to remove the bushings and install them in the control arms, you will have to take them to a machine shop to press them out and back in. you can't do this without a machine shop, that will probably cost you an additional $50 dollars. there are ways you can do it yourself, but the costs from the machine shop will be worth it, you wont have to deal with taking them out, plus it will also save you time in the long run, I recommend you take it to a machine shop. If you replace only the bushings, you will only spend 250 dollars instead of 650 dollars. I had to buy the control arms because I had to take a trip to Reno the following week, I couldn't wait, plus, since I have never done this before, I didn't want to take any chances. If you only replace the bushings, please take some pictures and post them here, I would appreciate any feedback or comments from you.Pathfinder Suspension Diagram:
the whole thing I was able to replaced it in about 4 hours. Here is a diagram that will help you find where the parts are located and shows you the torque specs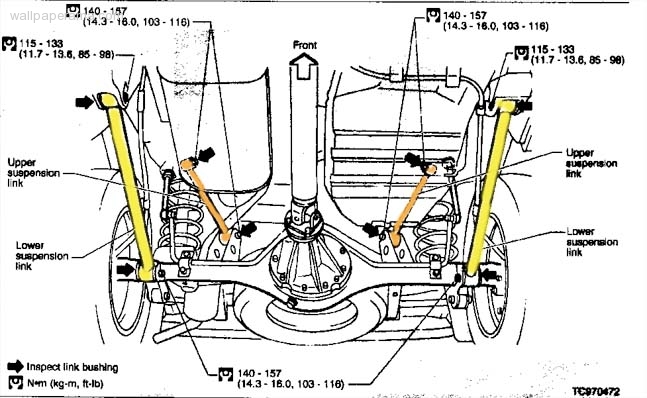
Mark
Sat Feb 27, 2016
Mark
Awesome! ! Very helpful. ..love my pathfinder.
Kevin
Mon Feb 14, 2011
I have a question. This is not a isolated simple part going out on these suvs.It's actually my friend's Pathfinder I'm looking for answers about. I have driven a few times lately and nearly flipped the vehicle due to the swaying that takes place. It's no joke that this problem will take lives. Why isn't this a safety recall? Or have we found more info since this post?
Lori
Tue Mar 11, 2014
i would like to know why this death wobble is not a recall??? how are we all talking about paying for an issue provided to us by nissan...the very reason we bought this product!!!!!!!! i cannot for one minute think of any reason that i would have purchased any kind of vehicle with a death wobble attached to it..this is an issue nissan knows about and is doing nothing about it, financially,or even to warn the public!! i would have never known this malfunction death wobble existed, if i hadn't asked the simple question ...why does my 2001 nissan pathfinder ... wobble when i drive it? i too, have had the shocks and struts replaced by seasoned mechanic. when i get my pathfinder back, i still have the "death wobble" how dare nissan to put us,.. and our families in such a dangerous ( without warning) trust in putting our children (just out of drivers ed... our senior citizens and so on) into these vehicles that we have stood by and trusted with our families and our lives for years!!!
dory
Sun Mar 16, 2014
i hear ya!!!
i bought my pathi as a used vehicle, they guy at the dealership said is "as is" no warantee :(
but you make a valid point.
i bought my pathi as a used vehicle, they guy at the dealership said is "as is" no warantee :(
but you make a valid point.
Lori
Sun Mar 16, 2014
hi kevin, please report this to national highway traffic safety admin. the more they hear of this huge problem the better. yes this needs to be a recall! i have asked myself why doesn't anybody seem to be talking about this problem.. let's get it going before anybody gets killed. unfortunately that is what happens before any body ( car companies) seems to take notice . yes, more posts are coming one right after another. please reply and everybody needs to tell nhts.
thank you, lori
thank you, lori
1998
Sat Dec 12, 2009
thanks, you saved this car from the junk yard:

https://www.wallpaperama.com/forums/nissan-pathfinder-how-to-replace-suspension-links-t6856.html
https://www.wallpaperama.com/forums/nissan-pathfinder-how-to-replace-suspension-links-t6856.html
Steve
Fri Oct 09, 2009
i changed the bushings in a 97 pathfinder and am about to change them in my 98 pathfinder. i cut the old ones out with a recip saw and metal cutting blade. first drill several holes around the inner metal tube thu the rubber bushing, then knock the inner metal tube out with a hammer. you could use a hack saw to cut the thin metal outer metal ring then knock it out with a hammer. i installed the new bushings by using a long, hard, fine threaded bolt and washers. the impact wrench easily pulled the bushing in. use lube. good luck.